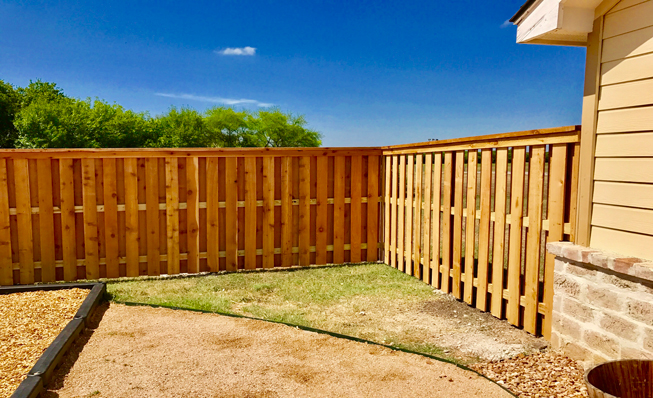
Hellooooo, I’m thinking about fences again! You all had the pleasure of following along as I moved and rebuilt the fence in my backyard and then converted a chainlink fence into a wood fence along my driveway, and now it’s finally time to build that two-panel wood driveway gate. Of course, I can’t just build a driveway gate and leave it at that, I’ve also decided to cap the entire fence to cover up the dogear pickets and give everything a cleaner and more finished look. HOORAY! Let’s dig into the plans:
I’m going to custom build the driveway gate and attach the pickets in a shadowbox pattern so it will match the rest of the fence. Instead of the traditional three horizontal cross pieces that come with the standard panels, I’ll be building a frame with a diagonal cross piece in it for more stability. The gate will also be a little bit thicker than the fence panels because, as I mentioned here, the pre-made panels use a non-standard piece of wood for the cross-pieces. Another level of complexity comes from the fact that I want the gate to swing in towards the garage and I need to be able to open it from either side. Time for more details.
Details
I’m building a two-panel gate that will meet in the middle of the driveway because the width would cause the gate to sag if it was only one panel. Since I kept the chainlink fence posts when I built the fence along the driveway, one side of the wood gate will need to be attached to the metal post and the other side will be attached to a reinforced deck post. This means I can’t just buy regular hinges and call it a day, so if you are looking to attach a wood gate to a chainlink post, here’s what you’ll need:
Chainlink Post Side
Wood Deck Side
Gate Hinges
I could also use the same Screw Eyes and these Screw Hooks on the wood side
Full Gate
2x4s
Corner Brackets (for the frame corners)
Two Way Gate Latch
These are surprisingly hard to find, I ordered this push/pull version and this one that looks like a regular door handle and I’m hoping one works. The push/pull has HORRIBLE reviews, so that will probably be going back.
Drop Rod
Might not need this if the latch does its job, but I want to make sure Fred isn’t going anywhere, so you can’t be too secure.
The Plans
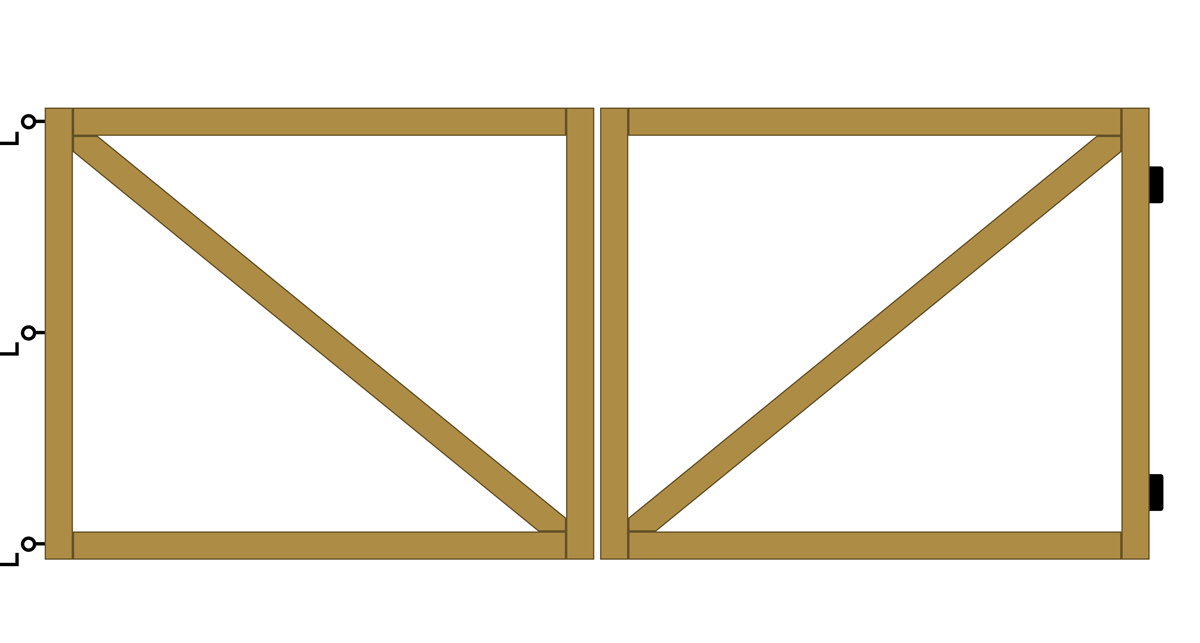
My two-panel wood driveway gate needs to cover an 11’5″ span and match the 6′ high fence I have around the rest of the yard. For maximum support, I will be adding angled cross braces inside the frame using 2×4 pressure-treated boards.

Three screw-in eye hooks will be attached to the left side of the gate and these will rest on the chainlink hinges
I need to add an extra piece of wood to span the full height of the deck post and then two or three wood gate hinges will connect the right side of the gate to the deck.
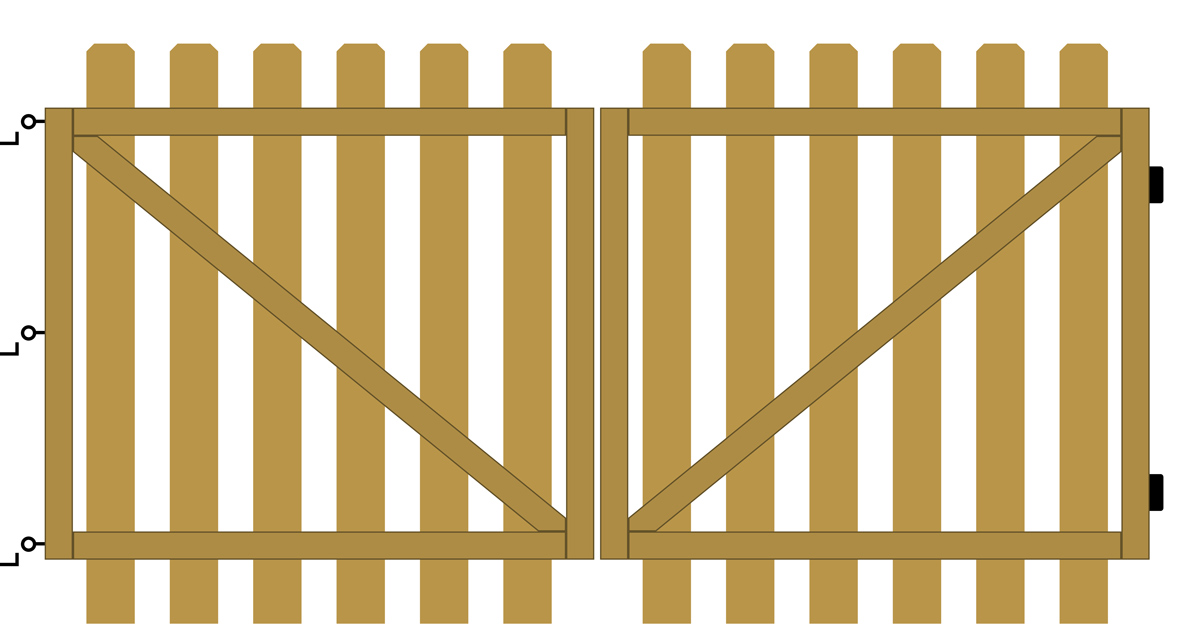
I bought 30 pickets which will be attached to the front and back of the frame in a shadowbox pattern, so you will be able to see the X frame through the gaps.
Everything will be stained using Behr Semi-Transparent Weatherproofing stain tinted to Antique Oak, like the rest of the fence.

Finally, pop on the latch and in-ground poke thing and the gate should be ready to roll.
I know this two-panel wood driveway gate is going to require a lot more precision than the fence panels did because they have to meet up perfectly in the middle in order to keep sweet baby Fred safe in the yard. So if you have any suggestions for a better way to approach building this bad boy, let me know in the comments!
Future Plans
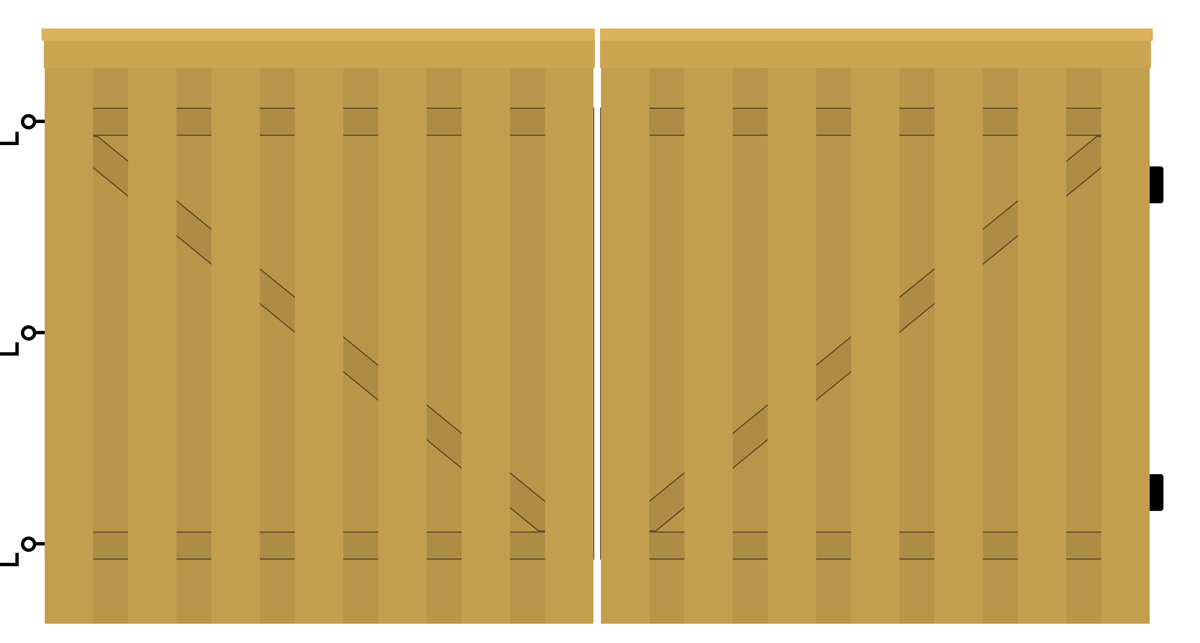
After I finish the gate, I’d love to cap off all of the shadowbox panels with a wood sleeve in this style:
It looks fairly straightforward to build, I just need enough nice days so I can stain all the wood! So the caps might have to wait until the Spring. Paul Ricalde has a good tutorial on youtube, so I’m pretty sure I’m a pro because I watched it.
Look how much more delicious the illustration looks with the cap:
More Chainlink to Wood Fence Projects
I have also been working with Erika to rig up a wood fence attached to a chainlink fence in the back corner of her yard and will follow up with another post about that soon!
Thanks for reading all the way through, here’s a gif.