It’s week 3 of the One Room Challenge and we are finally getting somewhere! Let’s fill you in on all the progress so far.
In order to increase our limited seating we purchased this super cute bench from Target:
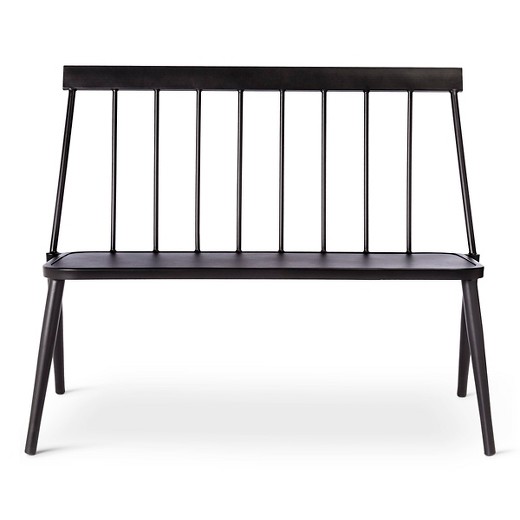
However, it really needs a cushion to be comfortable. I purchased a nice one from World Market that was the correct length but when I got it home, realized I didn’t measure the depth. It hung off the edge in a too-weird-to-keep way. I was left to sew my own! Thankfully I had some leftover foam from another project that I could use for this one too.

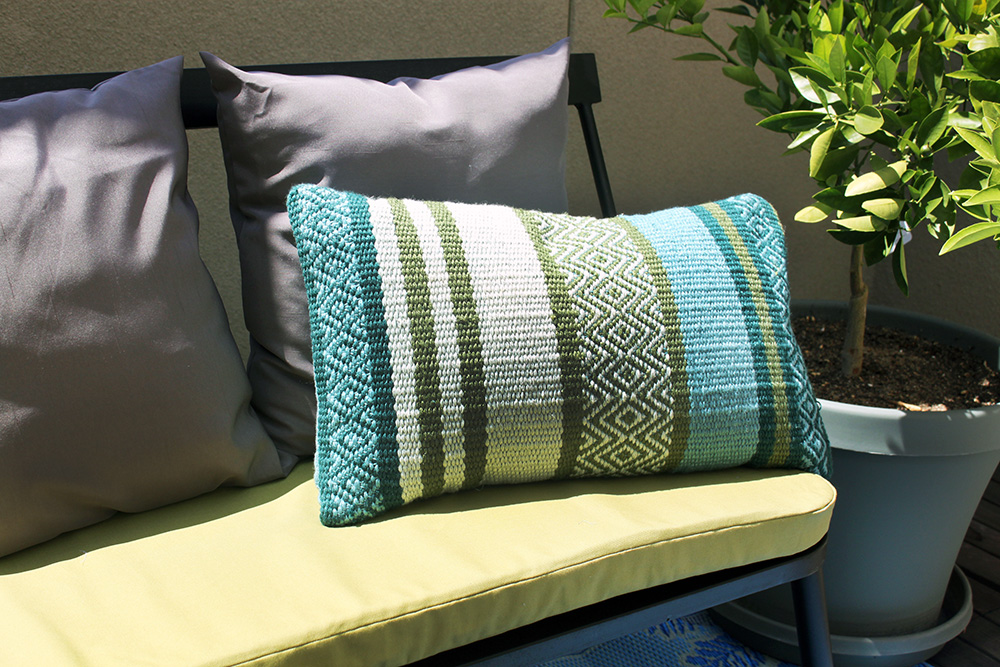
After a bunch of tests and trying to sew the tricky curved edges, I finally got something that looked like a cushion! Piled high with decorative outdoor pillows it’s not too shabby for DIY!
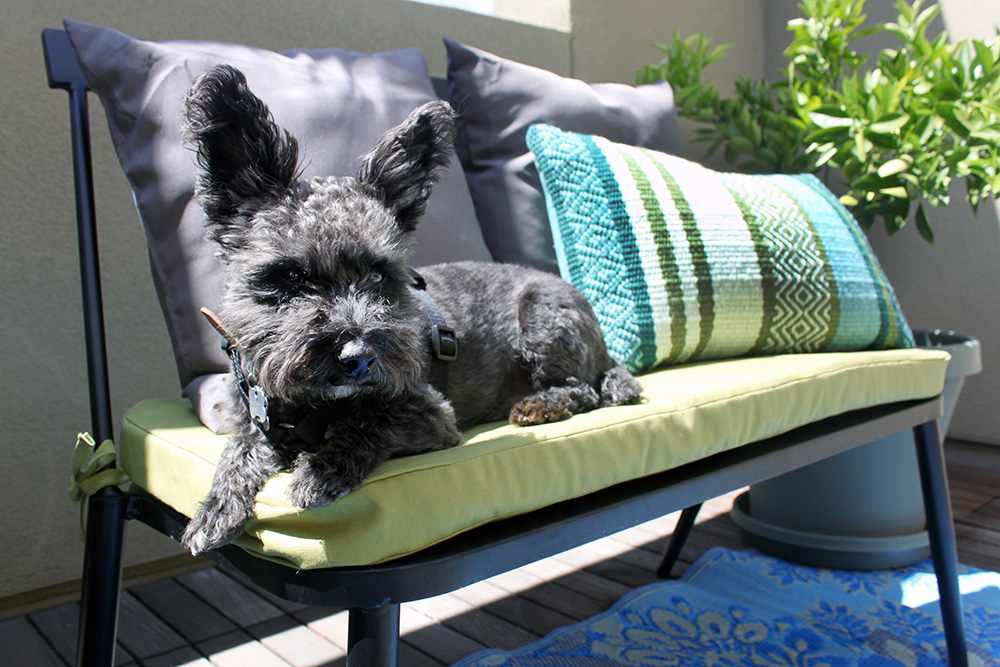
Charlie still approves and this has been his new go-to spot on the deck.
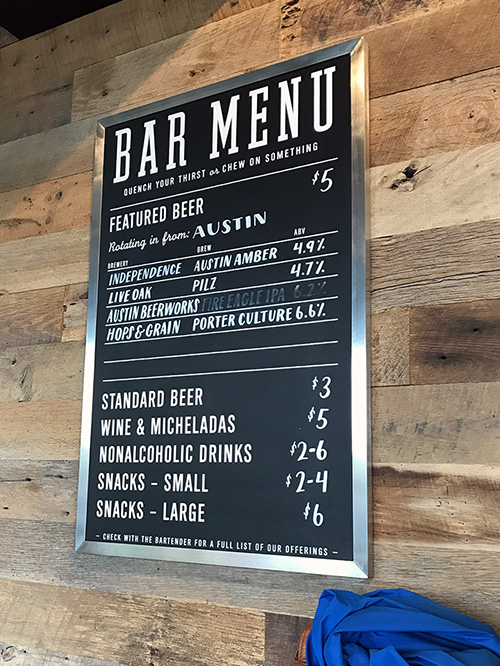
Next, onto the giant chalkboard. My boyfriend really wanted somewhere that we could write the menu for the BBQ à la this one we saw in Austin. I went around and around debating how I wanted to pull this off.
I first looked at metal poster frames and thought of painting the glass with the chalkboard paint. I still think this would look nice in the right setting since it gives you a finished frame and an easy way to hang it with the hangers on the back. However, this is a rental and we don’t want to do too much damage. So I opted out of this since hanging the frame was going to either damage the walls or require hanging something from the top. Back to the drawing board.
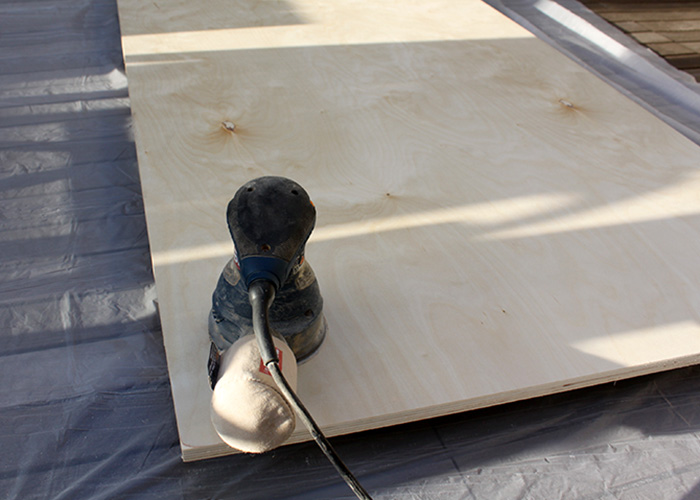
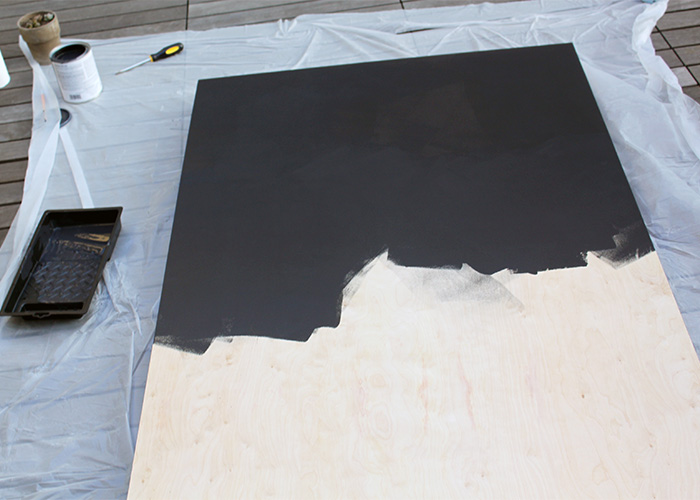
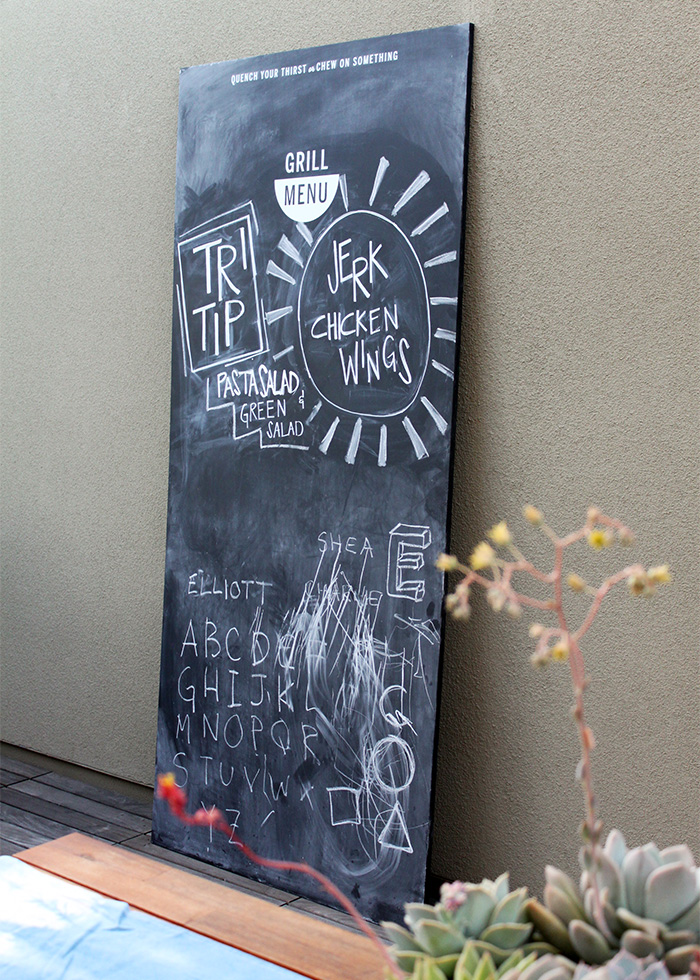
That’s when I realized we could get a large piece of plywood (with veneer so it’s really smooth) and paint that with the chalkboard paint. Much cheaper than the frame option and also lets us make it whatever size we wanted. After much debate, I went with 6.5-feet tall by 3-feet wide, which the lumber yard cut to size for me.
A few pointers from my first time using chalkboard paint:
- You want as smooth a surface as possible. Any bumps or texture will show on the chalk. I did a light sanding on the entire face.
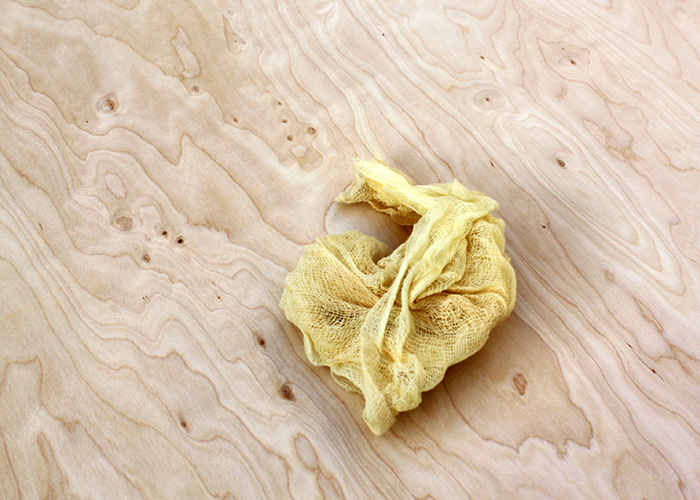
- Smooth surface right? So use a tack cloth to get up all that sanding powder.
- Apply paint just like you would on a wall. Go in overlapping sections and try not to over apply. Wait four hours between coats. I ultimately did two coats to make sure it was very opaque.
- Once it is dry, patiently wait three days for the chalkboard to really cure. Before you write on the board for the first time, “season” your board by rubbing the side of chalk on the entire surface.
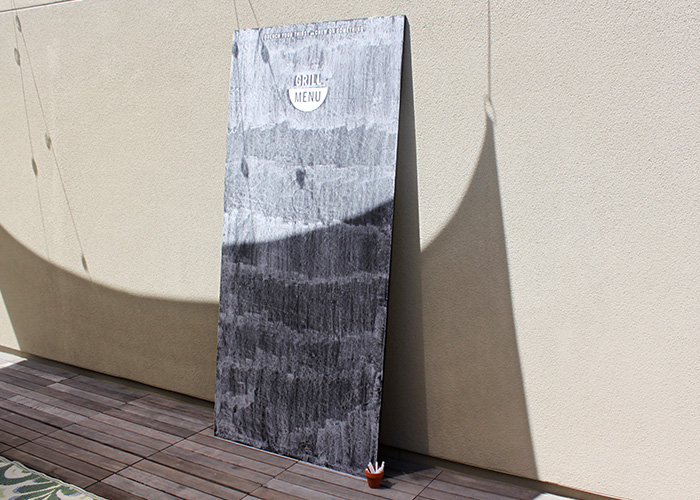
I wanted to add a vinyl design—remember that inspiration image? Since I work in the signage industry, I had a vinyl connection who cut the piece for me. See how you apply it below.
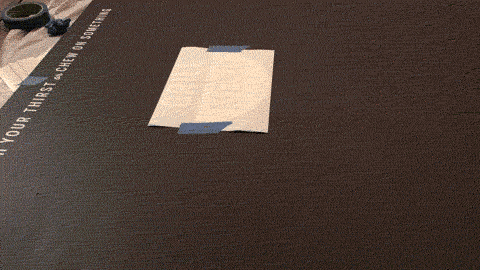
You position the vinyl exactly where you want it and apply a strip of tape to the top that will work as a hinge. Then flip it up, remove the protective backing, flip it back down, and slowly press into position. Done! Download my file for the vinyl at the bottom to cut your own.
Now you’re ready to write! I had some fun adding our Easter BBQ menu plus our friend’s kids thought it was so fun to write on the bottom.
What do you guys think? There’s more to come, but we did a small debut with friends and family at Easter. Any tips on how to maximize every inch of your outdoor space?
![]() You can follow along with all the participants with @OneRoomChallenge and #OneRoomChallenge and read all about it at Calling It Home.
You can follow along with all the participants with @OneRoomChallenge and #OneRoomChallenge and read all about it at Calling It Home.
See what our fellow guest participants are up to at the link up.
[x_subscribe form=”1812″]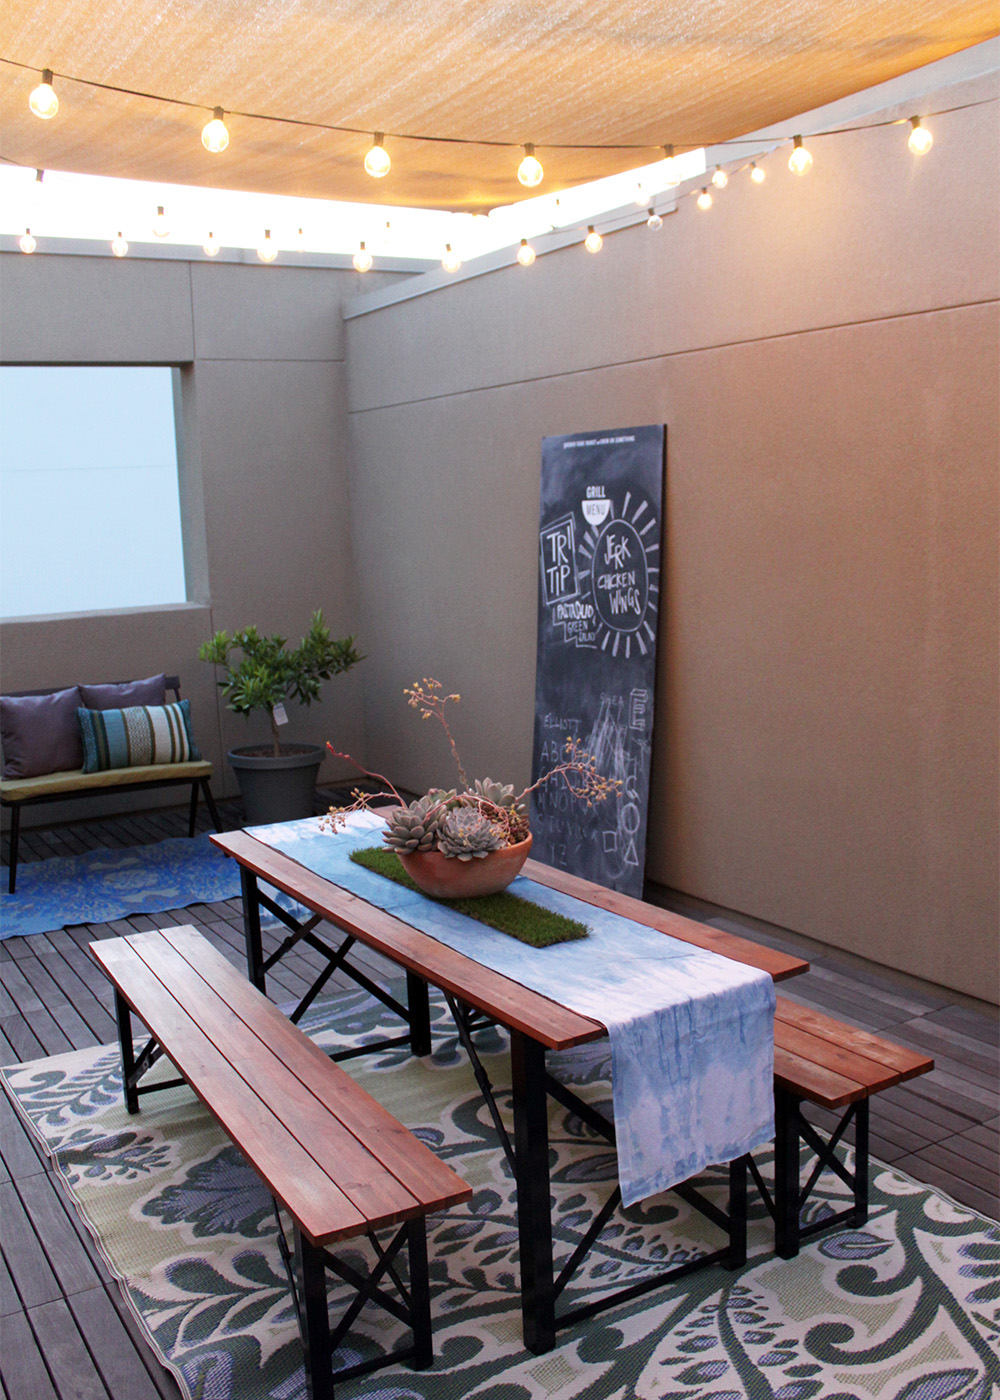


