Gallery walls are everywhere on the internet, and for good reason: they’re a great way to showcase your collection of artwork and give your space some personality. Here’s how I created an easy stairway gallery wall with Amazon frames.
But first, some backstory.
Before I had even moved out into my own place, I had started hoarding things to frame in my new home. I was excited about the idea of having a whole house or apartment that was mine (and a roommate’s) to do with as I pleased. Buying furniture or anything too large wasn’t very smart without an idea of where I would be living. So instead I was collecting postcards, art prints, and pictures to eventually hang up.
This worked out well when Michelle and I moved into our first big kid apartment together and turned an entire wall in our dining room into a gallery wall. But when we moved out and no longer had a giant blank wall to fill, I was left with boxes full of artwork.
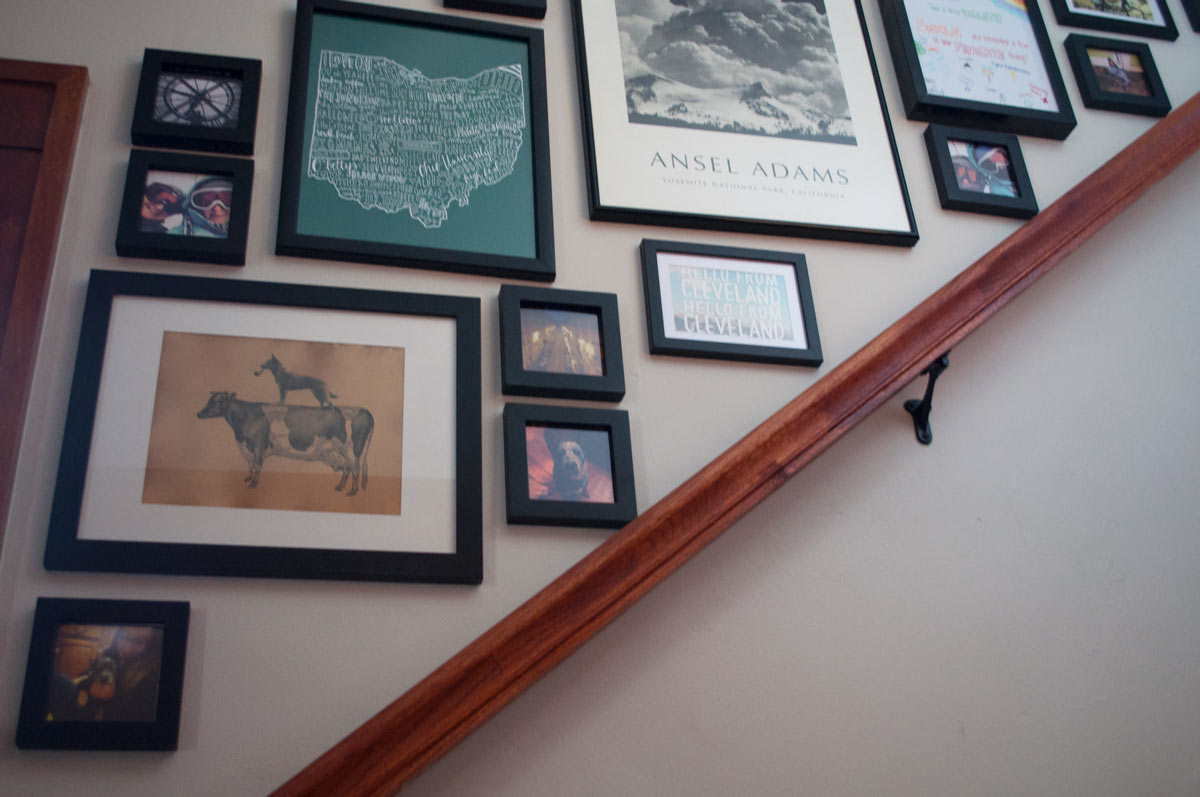
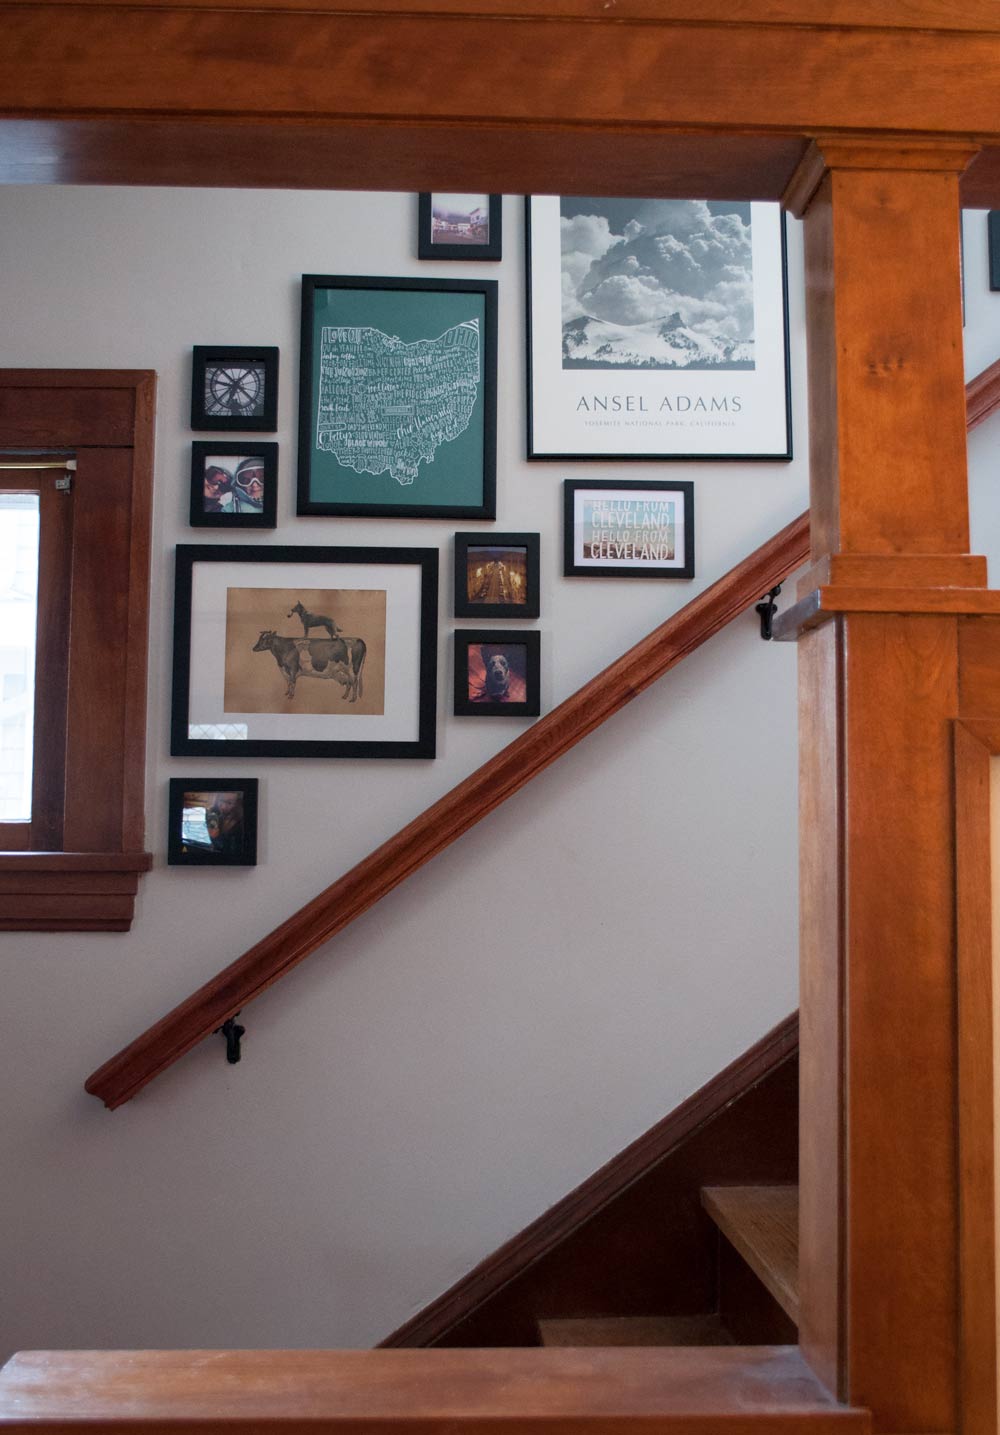
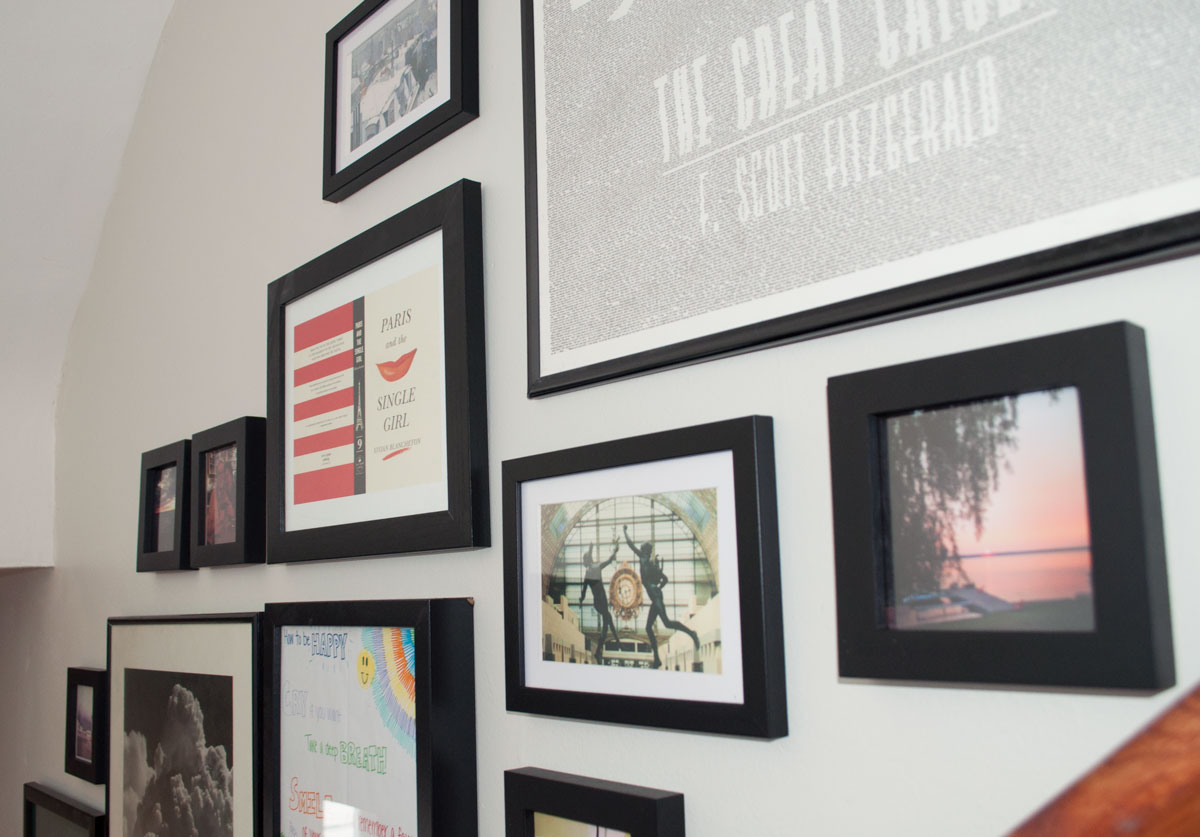
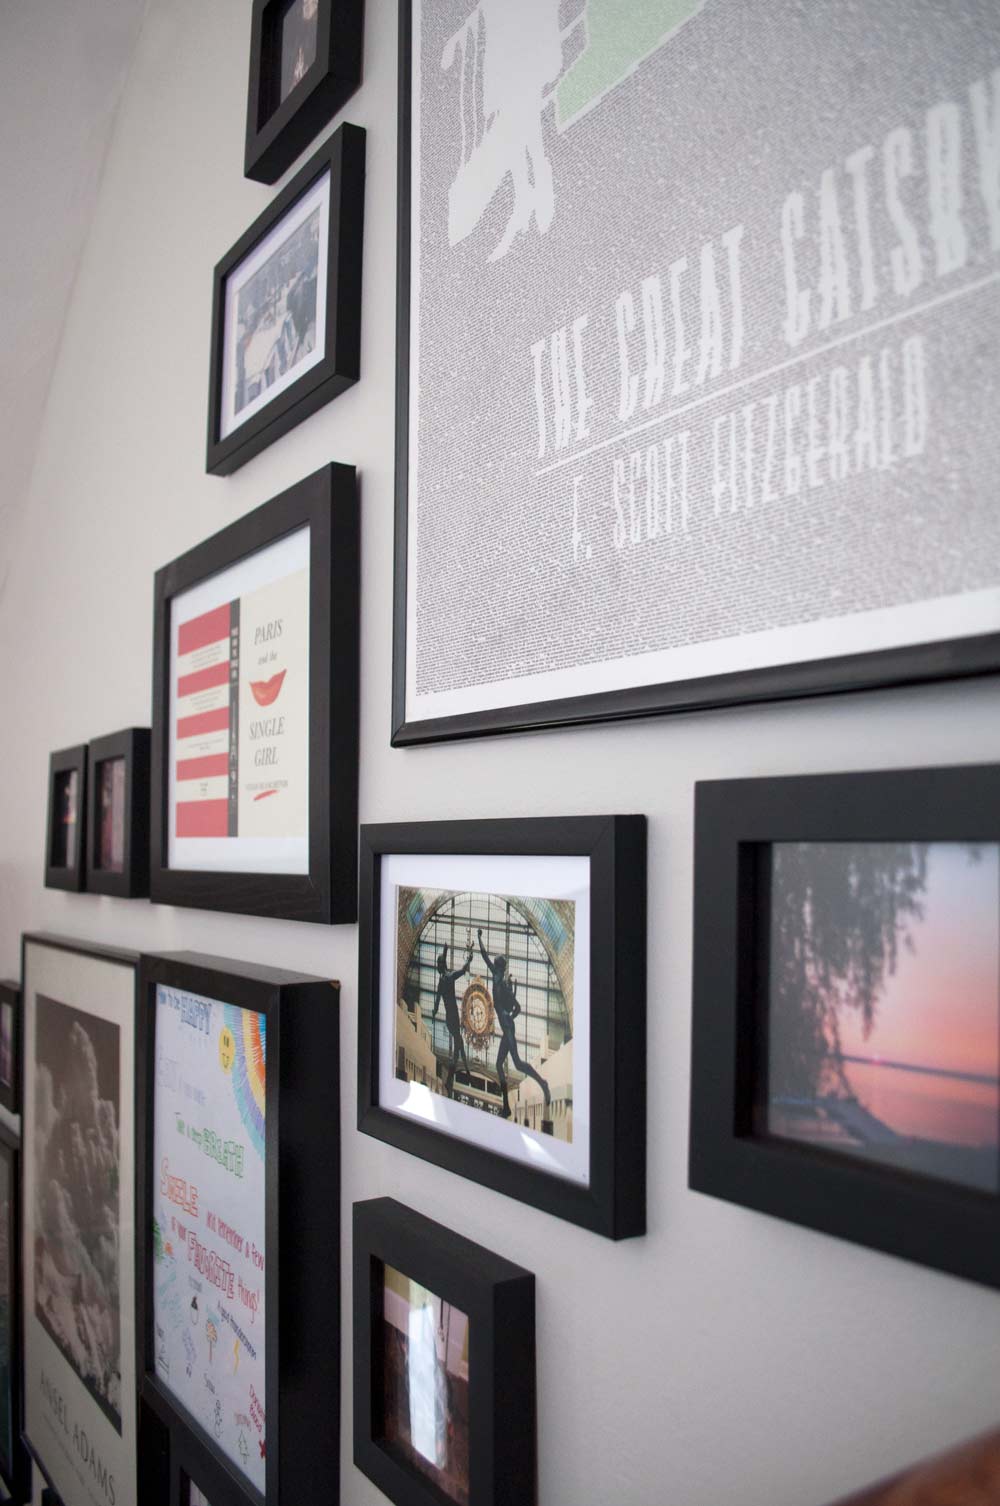
When I moved in with Zac, I decided that the stairway was the perfect place to display everything I had as well as Zac’s collection. But assembling a frame collage on an angle was a little trickier than a straightforward gallery wall. It required some smaller items to fill in the potentially awkward gaps.
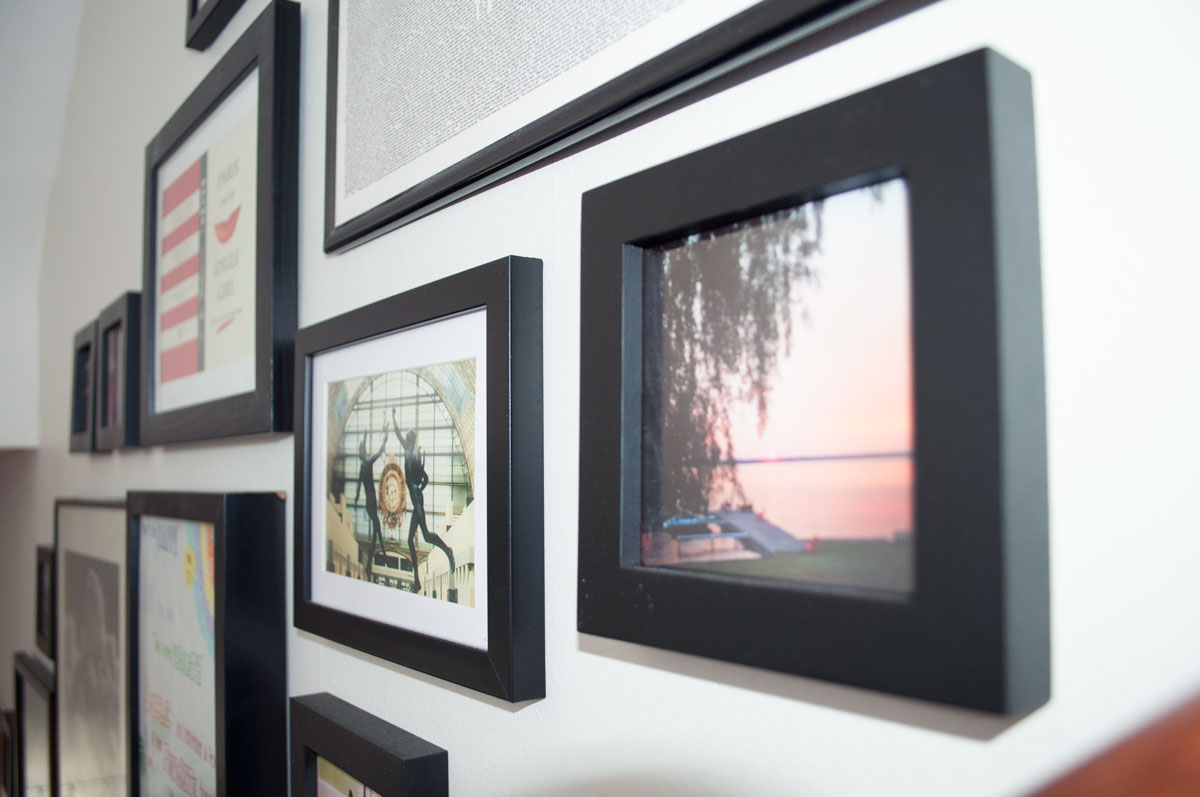
I had already had some of my Instagram pictures printed through Social Print Studios and I found some cheap little frames on Amazon. I needed some additional frames as well so I picked up some 4×6 frames on Amazon too. These smaller frames were the perfect size for tucking into blank spots on the wall.
I stuck with black frames since that’s what the majority of my stuff was already framed in. Since everything inside the frames was different, framing them in similar frames gives the overall gallery a little bit of continuity.
Now, onto the hanging. The best way to hang an easy stairway gallery wall? Use templates! I used a roll of wrapping paper that I was never going to use for gifts (it was One Direction…don’t ask) and traced my frames onto the blank side. I cut them out then wrote a description of what that template represented on the template itself. I also measured where the hanger was and marked that on the template as well.
From there I started sticking the templates on the wall with painter’s tape. This way I was able to see what fit where and how many frames I would need to fill the space before I put any holes in the wall.
Once I had a pretty good arrangement on the wall, I laid the frames out in (approximately) the same arrangement on the floor, just to make sure that everything looked ok next to each other. I didn’t want to have a bunch of colorful stuff next to it and then a corner of neutral things. The key is balance!
After I was sure that everything looked good I started hammering! Since I had already marked where the nails needed to go on the templates, I just nailed through the paper, ripped the paper off the wall, and hung the frames. It made hanging go really quickly.
As an added bonus, one of my packs of Amazon frames came with some adhesive to attach the bottoms or corners of frames to the wall. This was great since so many of frames were near the handrail and could easily get knocked off the wall.
That’s it, an easy stairway gallery wall! It’s not perfect but it’s a pretty easy and affordable way to make a big impact in your decor. Now I get to look at pretty pictures and fun memories every time I go up and down our stairs!
Have you struggled to set up artwork in a stairway? What was your solution? Let me know in the comments!